If you've ever stared at a blank code editor wondering what to build next with your microcontroller, you already know why maker codes robotics programming challenges matter. Challenges push you past the tutorial stage where you copy someone else's blinking LED sketch and into the zone where you actually solve problems with code. That gap between following instructions and building something original is where real learning happens and robotics programming challenges are one of the best ways to bridge it.
What exactly are maker codes robotics programming challenges?
These are structured tasks or project prompts designed to test your ability to program robots and microcontroller-based systems using maker-oriented tools like Arduino, Raspberry Pi, ESP32, and similar boards. A challenge might ask you to build a line-following robot, program a robotic arm to sort objects by color, or make a rover navigate obstacles using ultrasonic sensors. Unlike open-ended projects, challenges come with constraints deadlines, specific hardware requirements, or performance benchmarks which force you to think critically and write efficient code.
Many of these challenges draw from the same pool of skills covered in Arduino coding examples and programming basics, but they add a layer of complexity. Instead of just making an LED blink, you might need to coordinate multiple sensors, handle real-time input, and manage motor control simultaneously.
Why should you bother with programming challenges instead of just building projects on your own?
Self-directed projects are valuable, but they rarely push you outside your comfort zone. When you choose your own project, you naturally pick something within your current skill range. Challenges, on the other hand, are designed by someone else with a specific goal in mind often one that requires you to learn something new.
Here's what challenges actually do for you:
- Expose gaps in your knowledge. You might think you understand PID control until a challenge asks you to implement it on a balancing robot.
- Build debugging stamina. Real robotics work involves a lot of things not working. Challenges teach you to push through failure systematically.
- Create portfolio-worthy work. A completed challenge with documented code and results looks far better to employers or schools than a half-finished personal project.
- Connect you with other makers. Most challenge communities encourage sharing solutions, which means you learn from how others approached the same problem. The online community support around maker codes is especially helpful when you get stuck.
What types of robotics challenges can you actually try?
Challenges range from beginner-friendly to genuinely advanced. Here's a breakdown by difficulty:
Beginner challenges
- Obstacle avoidance robot: Program a wheeled robot with an ultrasonic sensor to navigate a room without hitting walls. You'll learn about sensor reading, conditional logic, and basic motor control.
- LED reaction game: Build a handheld device that lights up LEDs in a pattern and requires the user to press buttons in the correct sequence. Good practice for timing, interrupts, and state management.
- Temperature-based fan controller: Use a temperature sensor to automatically adjust a fan's speed. Teaches analog input reading and PWM output.
Intermediate challenges
- Line-following robot with PID: Go beyond simple if/else logic and implement proportional-integral-derivative control for smoother, faster line tracking.
- Bluetooth-controlled rover with sensor feedback: Control a robot from your phone while receiving live distance and orientation data on the app.
- Robotic gripper with servo sequencing: Program a multi-servo arm to pick up, move, and place objects in specific locations.
Advanced challenges
- Self-balancing robot: Combine an MPU6050 gyroscope/accelerometer with PID control to keep a two-wheeled robot upright.
- Autonomous maze solver: Program a robot to navigate and solve a maze using the flood-fill algorithm or wall-following logic.
- Multi-robot coordination: Get two or more robots to communicate and complete a task together, like collaborative object transport.
If you're just getting started with the basics, working through Arduino coding examples first will give you the foundation you need before tackling these.
What tools and hardware do you need to get started?
You don't need a expensive lab. Here's a practical starter kit:
- Microcontroller: Arduino Uno or Nano for beginners; ESP32 if you want WiFi/Bluetooth built in.
- Motors and drivers: DC motors with an L298N or L293D motor driver board, or servo motors for precise positioning.
- Sensors: Ultrasonic (HC-SR04), infrared (for line following), MPU6050 (gyroscope), and a temperature sensor cover most challenges.
- Chassis: A basic two-wheeled robot chassis kit costs under $15 and works for most mobile robot challenges.
- Code editor: Arduino IDE works fine. If you want better code formatting, try an editor with a monospace font like Fira Code for improved readability of nested logic.
- Breadboard and jumper wires: Essential for prototyping before committing to soldered connections.
What common mistakes do people make with robotics challenges?
Having worked through dozens of these challenges myself and watched others struggle, these are the mistakes I see most often:
- Skipping the planning phase. Jumping straight into code without mapping out the logic flow leads to tangled, buggy programs. Sketch a flowchart or pseudocode first even a rough one on paper helps.
- Not reading sensor datasheets. That ultrasonic sensor has a minimum detection distance and a beam angle. If you don't know these specs, your robot will behave unpredictably and you'll waste hours debugging code when the problem is physical.
- Hardcoding values everywhere. When you put magic numbers throughout your code instead of defining named constants, small changes become painful. Define pin numbers, thresholds, and speeds at the top of your sketch.
- Ignoring power supply issues. Motors draw more current than your Arduino's 5V pin can supply. Powering motors through the board instead of a separate supply is one of the most common causes of mysterious resets and erratic behavior.
- Testing everything at once. Integrate one component at a time. Get the motors working alone, then add a sensor, then combine them. Trying to debug a full system when you've never verified each part works is a nightmare.
- Not using serial monitoring. The serial monitor is your best debugging tool. Print sensor values, state variables, and decision logic to the console so you can see what the robot "thinks" is happening versus what's actually happening.
How do you actually solve a robotics programming challenge step by step?
Here's a process that works reliably:
- Read the challenge requirements completely. Note the hardware constraints, performance criteria, and any scoring rubric.
- Break the problem into subtasks. A line-following robot needs: (a) read infrared sensors, (b) determine position relative to the line, (c) calculate motor speeds, (d) drive motors. Solve each separately.
- Write and test subtask code independently. Create small test sketches for each function. Verify sensor readings with serial output before combining them.
- Integrate subtasks one at a time. Combine motor control with sensor reading first. Then add the decision logic. Then add any advanced features like PID tuning.
- Tune and iterate. Adjust constants, test in the actual environment, and refine. PID constants, sensor thresholds, and motor speed limits all need real-world tuning.
- Document your solution. Write comments explaining why you made certain decisions, not just what the code does. Include wiring diagrams and test results.
Where can you find robotics programming challenges to try?
Several places regularly post challenges worth attempting:
- Online maker communities and forums often run monthly or seasonal challenges with specific themes and hardware requirements.
- Robotics competition websites publish past challenge problems that you can attempt at home without entering the actual competition.
- Educational platforms focused on STEM education provide graded challenges with solution guides for when you get stuck.
- GitHub repositories maintained by maker groups sometimes host challenge sets with test cases and sample inputs.
You can also create your own challenges by setting constraints on familiar projects. For example, take a project you've already built and add a new requirement: make it wireless, add voice control, or cut the response time in half.
Practical next steps checklist
- ☐ Pick one beginner challenge from the list above and commit to finishing it within one week.
- ☐ Gather the required hardware. If you don't have it, order a basic robot chassis kit and sensor bundle.
- ☐ Write pseudocode for the challenge before touching your editor.
- ☐ Build and test each subsystem independently before combining.
- ☐ Use serial monitoring throughout development print every sensor value and decision branch.
- ☐ Document your final solution with comments, photos, and a short explanation of your approach.
- ☐ Share your solution in a maker community to get feedback and see how others solved the same problem.
- ☐ Move to an intermediate challenge once you've completed your first one comfortably.
Start small, finish what you start, and build up. The makers who improve fastest aren't the ones who tackle the hardest projects they're the ones who complete every challenge they begin and learn from each one.
 Maker Codes: Programming Fundamentals for Beginners Guide
 Maker Codes Arduino Coding Examples
 Online Community Support for Beginner Programmers and Makers
 Iot Starter Projects Using Maker Codes
 How to Create Qr Code Projects Using Maker Codes: a Step-by-Step Guide
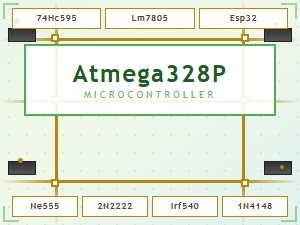 Common Maker Codes for Circuit Board Components Explained