If you're building robots whether it's a simple line-following car or a multi-servo robotic arm you've probably hit the same wall every maker hits: writing all the code from scratch takes forever. That's where a maker codes GitHub repository for robotics projects comes in. These shared codebases let you skip weeks of trial and error by standing on the work of thousands of hobbyists, engineers, and open-source contributors who've already solved the problems you're facing right now.
What exactly is a maker codes GitHub repository for robotics projects?
A maker codes GitHub repository for robotics is a public (or sometimes private) code collection hosted on GitHub that contains reusable scripts, libraries, firmware, and configuration files built specifically for robotics work. These repos typically include code for motor control, sensor integration, path planning, servo sequencing, and communication protocols like I2C, SPI, or serial.
Unlike generic software repos, robotics maker codes are tightly coupled to hardware. You'll find code written for Arduino boards, Raspberry Pi, ESP32, STM32, and other microcontrollers. The code often comes with wiring diagrams, pinout references, and step-by-step build instructions so you can get a working system without guessing.
Think of it like a shared toolbox. Instead of building your own wrench, you grab one that someone already tested and documented.
Where can you find quality robotics maker code repositories?
GitHub hosts millions of repositories, but not all of them are useful or well-maintained. Here's where to look and what to search for:
- GitHub Explore and Topics Search for tags like robotics, arduino-robot, ros, motor-control, or maker to find curated and trending repos.
- Awesome Lists The community maintains "awesome-robotics" and "awesome-arduino" lists that link to high-quality repositories with active contributors.
- GitHub Organizations Groups like Arduino, ROS (Robot Operating System), and Adafruit maintain collections of verified robotics code.
- Maker community forums Reddit's r/robotics, Hackaday, and Instructables often link directly to GitHub repos with tested project code.
You can also explore alternatives. Some makers prefer hosting their maker codes on GitLab if they want more control over CI/CD pipelines or private collaboration features.
How do you actually use a robotics maker code repo?
Finding a repo is the easy part. Making it work with your hardware takes a few steps:
- Clone or download the repository Use
git cloneor download the ZIP file directly from GitHub. - Read the README Seriously. Most robotics repos include hardware requirements, library dependencies, and setup instructions in the README file. Skipping this step is the number one reason people get stuck.
- Install dependencies Many repos rely on specific libraries. For Arduino projects, you'll often need to install libraries through the Arduino Library Manager or via a package manager. If you're working with Arduino maker codes and NPM libraries for embedded systems, the dependency setup looks slightly different from a standard Python or C++ project.
- Flash or upload the code Transfer the code to your microcontroller using the IDE or command-line tool that matches your board.
- Test and adjust Robotics code almost always needs tweaking for your specific hardware. Pin assignments, motor speeds, sensor thresholds, and PID values are rarely universal.
What separates a good robotics repo from a bad one?
Not every GitHub repo with "robot" in the name is worth your time. Here's what to look for before you commit to building around someone else's code:
- Recent activity Check the last commit date. Repos that haven't been updated in two or more years may use outdated libraries or deprecated APIs.
- Clear documentation A good repo explains what hardware it targets, what software version it requires, and how to troubleshoot common issues.
- Issue tracking Look at the Issues tab. If there are dozens of unanswered bug reports, that's a red flag. If maintainers actively respond, that's a good sign.
- License Most maker codes use MIT, GPL, or Apache licenses. Make sure the license allows your intended use, especially if you plan to sell a product.
- Community contributions Repos with multiple contributors and open pull requests tend to be more reliable and feature-rich.
What are common mistakes makers make with open-source robotics code?
Using shared code isn't just copy-paste. Here are the pitfalls that trip up beginners and experienced builders alike:
- Ignoring hardware differences Code written for an Arduino Uno won't always behave the same on an ESP32. Clock speeds, pin mappings, and voltage levels matter.
- Not versioning your changes Modify a repo's code without tracking your edits, and you'll lose working configurations fast. Use Git branches or at minimum save dated copies.
- Skipping calibration steps Sensor data, motor speeds, and servo angles all need calibration for your specific build. Running code "as-is" on different hardware often leads to erratic behavior.
- Assuming the code is bug-free Open-source doesn't mean production-tested. Always bench-test before integrating into a larger project.
- Not giving credit Most licenses require attribution. If you publish your project, mention the original repo and its author.
Which programming languages show up most in robotics maker repos?
The language depends on the hardware and the project scope:
- C/C++ Dominates Arduino and STM32 projects. Most motor control and sensor reading code uses these.
- Python Common in Raspberry Pi robotics, computer vision projects, and ROS-based systems.
- MicroPython / CircuitPython Growing fast for ESP32 and microcontroller-based bots where rapid prototyping matters more than raw performance.
- JavaScript Shows up in Johnny-Five and NodeBots projects that use NPM packages to control hardware over serial connections.
Typography might seem unrelated, but if you're documenting your robotics project or building a dashboard interface, picking a clean typeface like Montserrat can make your README and UI look professional without extra effort.
How do you contribute your own robotics code to a GitHub repository?
Once you've built something that works, giving back to the community is straightforward:
- Create a new GitHub repository Give it a clear, descriptive name like line-follower-robot-arduino rather than project1.
- Write a detailed README Include what the project does, what hardware it needs, how to set it up, and what libraries to install.
- Add a license MIT is the most common for maker projects. Add it on day one so contributors know the terms.
- Organize your code Separate firmware, schematics, and documentation into folders. Include comments in your code explaining non-obvious decisions.
- Push and share Post it on GitHub, link it in maker communities, and tag it with relevant topics so others can find it.
What should you do right now?
Start small. Pick one component of your robotics project maybe motor control or ultrasonic sensing and search GitHub for a maker code repo that handles it. Clone it, read the documentation, flash it to your board, and see how it behaves. Then modify it. Break it. Fix it. That's how you learn.
Here's a quick checklist to get started:
- Define your hardware Know your board, motors, sensors, and communication protocols before searching for code.
- Search GitHub with specific terms Use phrases like "Arduino robot motor PID" or "ESP32 robotic arm servo" instead of generic searches.
- Evaluate the repo Check the last update, documentation quality, license, and issue activity.
- Fork before modifying Always fork the repo so you can track your changes without losing the original.
- Test one module at a time Don't flash an entire robotics codebase at once. Get one sensor or motor working first, then integrate.
- Document as you go Your future self (and the community) will thank you for clear notes and updated README files.
- Share your work Upload your modified code, even if it's messy. Someone else will find it useful.
 Beginner's Guide to Hosting Maker Codes on Gitlab
 Arduino Maker Codes Npm Library for Embedded Systems Projects
 Maker Codes Repository Best Practices for Version Control Guide
 Open Source Maker Codes Raspberry Pi Collaboration Platform
 How to Create Qr Code Projects Using Maker Codes: a Step-by-Step Guide
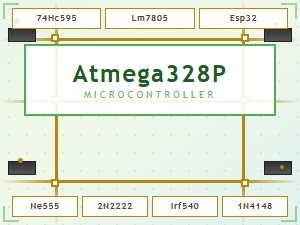 Common Maker Codes for Circuit Board Components Explained