Building embedded systems with Arduino has never been more accessible, but managing, sharing, and reusing code across projects still trips up a lot of makers. The arduino maker codes npm library for embedded systems is a package management approach that lets developers install, update, and distribute Arduino sketch libraries through npm the same tool millions of JavaScript and Node.js developers already use daily. If you've ever copied and pasted code between Arduino projects or struggled to keep your sensor libraries organized, this approach solves a real problem.
What does the arduino maker codes npm library actually do?
At its core, this npm library acts as a bridge between the npm ecosystem and Arduino development workflows. Instead of manually downloading .ino or .cpp library files from random GitHub repos, you run a single npm install command and get a tested, versioned library pulled into your project. The package typically includes Arduino-compatible source files, header definitions, configuration templates, and sometimes build scripts that integrate with tools like PlatformIO or Arduino CLI.
Think of it like this: Arduino's built-in Library Manager works fine for official and community-reviewed libraries. But if you're building custom maker projects combining multiple sensors, actuators, communication protocols, or display modules you need something more flexible. An npm-based approach gives you dependency management, version locking, and the ability to script your entire build process.
Why use npm instead of Arduino's built-in Library Manager?
Arduino's Library Manager is great for single-library installs. But maker projects often pull in 5, 10, or even 20 dependencies. Managing those manually gets messy fast. Here's why npm makes sense for larger embedded projects:
- Version control: npm tracks exact library versions in a
package.jsonfile, so your project always uses the right code. If you're new to managing code repositories, following best practices for version control and code repositories will save you headaches down the line. - Dependency resolution: When Library A depends on Library B, npm handles the chain automatically.
- Scripting and automation: You can write npm scripts to compile, upload, and test your Arduino code without touching the IDE.
- Cross-platform consistency: Whether your teammate runs Linux, macOS, or Windows, the same
npm installproduces the same environment. - Integration with web dashboards: Many embedded projects now include a web interface for configuration or data visualization. If you're building dashboards where you'd choose clean typefaces like Roboto Mono for code readability or Inter for UI elements, npm manages both your Arduino backend libraries and your frontend assets in one project.
How does it work with different embedded hardware?
The arduino maker codes npm library isn't limited to Arduino Uno or Mega boards. Because the library typically outputs standard C/C++ files, it works with any board supported by the Arduino framework ESP32, ESP8266, STM32, SAMD21, and even Raspberry Pi Pico. Some packages include board-specific configuration files that auto-detect your hardware and adjust pin mappings, clock speeds, or communication settings accordingly.
For projects that span multiple platforms say an ESP32 doing sensor collection and a Raspberry Pi running a local server you might find it helpful to look at how open-source maker codes work with Raspberry Pi collaboration platforms. The same npm package can sometimes serve both sides of the system.
A practical example: temperature monitoring system
Let's say you're building a temperature monitoring system with an ESP32, a DHT22 sensor, an OLED display, and MQTT for sending data to a broker. Without an npm-based setup, you'd manually hunt for and install:
- A DHT22 sensor library
- An SSD1306 OLED driver
- An MQTT client library
- A WiFi manager library
- A JSON serialization library for message formatting
With an npm package for Arduino maker codes, your package.json lists all five dependencies. One command installs them all. Your build script compiles everything and uploads to the board. No missing files, no version conflicts, no "it works on my machine" problems.
What are common mistakes when using npm for Arduino projects?
This approach has real benefits, but people run into predictable problems:
- Ignoring the build toolchain: npm installs the source files, but you still need Arduino CLI, PlatformIO, or another compiler toolchain installed separately. npm doesn't compile Arduino code on its own.
- Not locking versions: Always commit your
package-lock.json. Without it,npm installmight pull slightly different versions on different machines. - Overcomplicating simple projects: If your sketch uses one sensor and runs on an Uno, you probably don't need npm. The overhead isn't worth it for a single-file project.
- Assuming all Arduino libraries exist on npm: The npm registry has growing Arduino support, but it's not as complete as Arduino's own Library Manager. Some niche sensor libraries may only exist on GitHub or the Arduino platform.
- Skipping documentation: When you build or contribute a library package, poor docs make it useless for others. Good documentation practices apply here just as much as when you host maker codes on GitLab for collaboration.
How do you set up an Arduino project with npm?
Getting started is straightforward. Here's the basic workflow:
- Initialize your project: Run
npm initin your project folder to create apackage.json. - Install maker code libraries: Use
npm installfollowed by the package name. For example,npm install arduino-maker-codes-serial. - Configure your board target: Many packages include a config file where you specify your board type, port, and upload speed.
- Link or copy libraries to your Arduino sketch folder: Some packages include a post-install script that handles this automatically. If not, you'll need to symlink or copy the
srcfolder into your Arduino libraries directory. - Write your sketch: Include the library headers in your
.inofile just like any other Arduino library. - Compile and upload: Use an npm script like
npm run buildornpm run uploadto trigger compilation through Arduino CLI or PlatformIO.
Tips for getting the most out of this approach
- Start small: Convert one existing project to npm management before converting your entire workflow. You'll learn the quirks on something low-stakes.
- Use PlatformIO as your build backend: PlatformIO already has excellent npm-like dependency management for embedded systems. Combining it with npm packages gives you the best of both approaches.
- Write wrapper libraries: If you have common code you reuse across projects (WiFi setup, OTA updates, sensor reading routines), package it as your own npm library. Future-you will thank present-you.
- Test on real hardware early: Unlike pure JavaScript, embedded code depends on physical hardware behavior. Don't wait until the end to flash and test.
- Keep your dependencies lean: Every library adds compile time and flash memory usage. On an ATmega328P with 32KB flash, you'll hit limits fast. Audit what you actually need.
When should you skip npm and use something else?
If you're doing a weekend project with an Uno and a couple of sensors, Arduino's built-in Library Manager is simpler and plenty capable. npm shines when you have multiple team members, complex dependency trees, CI/CD pipelines, or web-connected embedded systems where you want one package manager handling everything from firmware to frontend dashboard code.
For larger collaborative projects, having a solid repository setup matters as much as your package manager choice. Keeping your code organized with clear version control and repository practices ensures that your npm-managed Arduino project stays maintainable as it grows.
Next steps: your action checklist
- Audit your current projects: Pick one Arduino project that uses three or more external libraries.
- Install Arduino CLI or PlatformIO if you haven't already npm needs a build toolchain to compile for your board.
- Run
npm initin a new project folder and install one maker codes package to test the workflow. - Document your setup: Write a short README explaining which npm packages your project depends on and how to build it.
- Share what you build: Publish your own maker codes library to npm if you've written reusable Arduino code. The community grows when people contribute back.
This approach won't replace Arduino's ecosystem it extends it. The arduino maker codes npm library for embedded systems fills the gap between simple sketches and production-grade embedded projects where dependency management, automation, and collaboration actually matter.
 Maker Codes Github Repository for Robotics Projects
 Beginner's Guide to Hosting Maker Codes on Gitlab
 Maker Codes Repository Best Practices for Version Control Guide
 Open Source Maker Codes Raspberry Pi Collaboration Platform
 How to Create Qr Code Projects Using Maker Codes: a Step-by-Step Guide
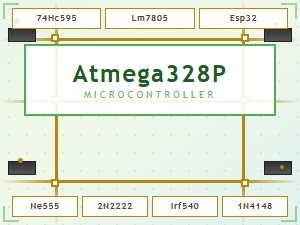 Common Maker Codes for Circuit Board Components Explained